Many people believe making ice cream requires a special machine or hours of churning. While traditional ice cream makers do take time, your Vitamix blender can create a smooth, creamy frozen dessert quickly without extra equipment.
This method works because the Vitamix’s powerful motor and tamper tool blend frozen fruit or cream into soft-serve texture, bypassing the need for churning and making homemade ice cream accessible and customizable.
How to Make Ice Cream in a Vitamix Blender
You can make smooth, scoopable ice cream in your Vitamix blender in under 10 minutes using frozen ingredients and the tamper tool. This easy recipe uses a ratio of 1 pound of frozen fruit, 1 cup of creamy liquid, and 1/4 cup of sweetener for about 4 servings of ice cream.

Start by layering your ingredients in the Vitamix container from bottom to top: first the creamy liquid, then the sweetener, and finally the frozen fruit or frozen cream cubes on top. This order helps the blades catch and blend the frozen pieces evenly.
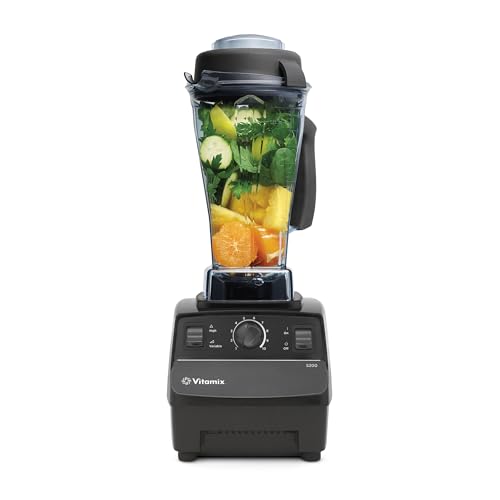
Once blended, serve immediately for soft serve texture or transfer to a freezer-safe container and freeze for 1 to 3 hours to firm up the ice cream for scooping later. Avoid blending longer than 40 seconds to prevent melting and a runny texture.
Best Ingredients for Making Ice Cream in a Vitamix Blender
Choosing the right ingredients makes all the difference in your Vitamix ice cream texture and flavor. The creamy liquid you use sets the base: heavy cream or full-fat coconut milk create rich, smooth ice cream, while non-dairy milks like almond or oat milk offer lighter, dairy-free options.

- Heavy cream or full-fat coconut milk for classic creamy texture
- Non-dairy milks like almond, oat, or soy for dairy-free ice cream
- Frozen bananas provide a natural creamy base and sweetness
- Frozen berries and other fruit add flavor and body
- Frozen milk or cream cubes help create a thick, scoopable consistency
Sweeteners vary from natural options like honey, maple syrup, or agave to granulated sugar or sugar substitutes. Adding about 1/4 cup per pound of frozen fruit balances tartness without making the mixture too thin or sticky.
You can customize your Vitamix vanilla ice cream recipe by adding vanilla extract, cocoa powder, or spices directly during blending. Mix-ins like chocolate chips, nuts, or cookie pieces work best folded in after blending to preserve texture.
Adjust the amount of creamy liquid gradually to control how thick or soft your ice cream turns out — start with 1 cup and add a tablespoon more if needed. Too much liquid will create a thinner, less scoopable result.
How to Store and Serve Homemade Vitamix Ice Cream
You can store Vitamix ice cream in the freezer for 1 to 3 hours after blending to achieve a scoopable texture. This step firms up the ice cream without turning it rock hard, making it easier to serve.
Choose a shallow, airtight freezer container for storing your ice cream. A wide, flat container lets the ice cream freeze evenly and thaws faster when you’re ready to serve. Cover it tightly with a lid or plastic wrap to prevent ice crystals from forming.
Common Mistakes That Ruin Vitamix Ice Cream and How to Fix Them
If your Vitamix ice cream turns out icy or grainy, it often means the frozen ingredients weren’t blended quickly enough or the fat content was too low. High-speed blending and enough creamy liquid help prevent ice crystals from forming.
Not thickening properly usually happens when the blender speed is too low or the frozen fruit isn’t frozen solid. Using a tamper to push ingredients toward the blades during blending ensures smooth, thick ice cream.
Over-blending generates heat that melts the ice cream base, resulting in a runny texture instead of firm ice cream. Blend only 30 to 40 seconds at high speed and stop as soon as you hear the motor sound change and see thick mounds form.
| Problem | Cause | Fix |
|---|---|---|
| Icy or grainy texture | Too little fat or too much liquid | Add heavy cream or full-fat coconut milk; reduce liquid |
| Not thickening or blending | Low speed or insufficiently frozen fruit | Use tamper; increase speed; freeze fruit longer |
| Too soft or melted | Over-blending creates heat | Blend less time; stop when thick and creamy |
| Too hard after freezing | Too long in freezer or too much fat | Freeze shorter time; reduce fat slightly |
Adjusting the fat and sweetener affects texture and flavor balance. Fat from cream or coconut milk makes the ice cream creamy, while sweeteners like natural honey or maple syrup help keep it soft by lowering the freezing point.
If your Vitamix blender is not working properly during ice cream preparation, check that the tamper is correctly inserted and that the frozen ingredients are small enough to move easily. Overloading or large chunks can stall the motor.
Variations for Special Diets and Health Needs
You can make dairy-free ice cream in your Vitamix using frozen bananas and full-fat coconut milk for creaminess without dairy. This combination yields a smooth texture similar to traditional ice cream while being gentle on digestion for those avoiding lactose.
For a healthier ice cream recipe, choose natural sweeteners like maple syrup, honey, or stevia instead of refined sugar. Using about 1/4 cup of these sweeteners per pound of frozen fruit keeps sweetness balanced without spiking blood sugar sharply.
Low sugar Vitamix ice cream is possible by reducing or skipping added sweeteners entirely and relying on the natural sugars in ripe frozen fruits such as mango or berries. This is helpful if you need to control sugar intake for conditions like diabetes.
Kidney-friendly ingredient swaps include using water or almond milk instead of dairy or coconut milk, as these have lower potassium and phosphorus. Also, avoid high-potassium fruits like bananas and opt for lower-potassium frozen fruits such as blueberries or peaches.
- Use 1 cup full-fat coconut milk plus 1 pound frozen bananas for a creamy dairy-free base.
- Replace sugar with 1/4 cup natural sweetener or omit to reduce sugar.
- Swap dairy or coconut milk for almond milk or water for kidney-friendly options.
- Choose frozen berries or peaches over bananas to limit potassium.
- Add a small amount of vanilla or cinnamon for flavor without extra sugar.
Gentle digestion tips include blending the mixture just until smooth to avoid heating and breaking down fibers that can cause digestive discomfort. Also, avoid adding nuts or heavy fats if you have a sensitive stomach.
If you already blended your ice cream and it feels too sweet or rich, thin it with a splash of unsweetened almond milk or water and blend briefly again to adjust texture and sweetness.
For all variations, start your Vitamix on low speed, add ingredients in order—frozen fruit first, then liquid, then sweetener—and increase to high speed while using the tamper. Blend about 30 to 40 seconds until you hear the motor change and the ice cream forms four distinct mounds.
If you want to explore more ingredient swaps and techniques for your Vitamix, check out which Vitamix blender to buy for specific features that help with ice cream texture and consistency.
Best Blenders for Making Ice Cream
The Vitamix blender is one of the best choices for making smooth, scoopable ice cream quickly because of its powerful motor and sharp blades that crush frozen ingredients evenly. Other high-speed blenders with similar features can also work well, but not all blenders handle frozen fruit or ice with the same ease or texture quality.
Look for a blender with a tamper tool to push ingredients toward the blades, a strong motor of at least 2 horsepower, and a container that can hold at least 64 ounces for multiple servings. These features help prevent icy or grainy textures and make blending easier.