How to Use a Juicer: 8–32 oz in 15 Minutes
On this page 7 sections
Most people lose juice, clog their machine, or spike their blood sugar simply because nobody ever walked them through the details of juicing. A calm, clear routine helps a lot, especially if you’re adjusting drinks around a new diagnosis or an upcoming procedure.
The biggest mistake people make is overloading the juicer with soft, very sweet fruit and pouring a tall glass right away. That can mean a sticky, foamy mess, a sugar rush, and juice that oxidizes before you can enjoy it. A few small changes in prep, order, and portion size fix most of that.
How to Use a Juicer Step by Step
You use a juicer machine safely by prepping produce, assembling the parts in the right order, then feeding ingredients steadily and cleaning up right away, which usually takes about 15–30 minutes start to finish. For a typical home centrifugal or masticating model—and even a professional cast iron juicer—you’ll wash and cut enough fruits and vegetables for about 16 oz (2 cups) of juice, juice in small handfuls, then strain, serve, or refrigerate the juice and clear out the pulp.
Here’s how to use a juicer step by step so you get good yield without straining the motor or risking cuts. If you’re wondering how to use your professional cast iron juicer, the same prep and cleanup routine applies, you’ll just turn a handle instead of pressing a power button.
Choosing and Assembling Your Type of Juicer
Choosing the right type of juicer and assembling it in the right order lets you juice safely, whether you use a small countertop unit or a heavy-duty machine built for big batches.
Early on it helps to be clear about juicers and blenders, how citrus-only orange juicers (manual and electric) fit in, and where commercial juicers, a steam juicer, or a dedicated wheat grass juicer might make sense for you.
At home most people decide between a centrifugal juicer, a masticating (cold-press) juicer, a simple citrus juicer, or a high-speed blender plus strainer for juice-like drinks.
| Type | Best Use | Key Pros | Watch For |
|---|---|---|---|
| Centrifugal juicer | Quick 8–16 oz glasses from apples, carrots, celery | Fast, often more affordable, handles hard produce well | Juice is frothier and oxidizes faster; not ideal for wheatgrass or large amounts of leafy greens |
| Masticating (cold-press) juicer | Leafy greens, wheatgrass shots, higher yield from expensive produce | Gentler extraction, better for greens, usually drier pulp and higher juice yield | Slower and often heavier; more parts to assemble and clean |
| Citrus juicer (manual or electric orange juicer) | Oranges, lemons, limes, grapefruits | Very simple setup, great if you mainly want orange juice | Limited to citrus; many are single-purpose appliances |
| Blender + strainer | Thicker juices and smoothies with fiber | Keeps pulp and fiber unless you strain; nothing new to assemble if you already own a blender | Needs a fine strainer or nut-milk bag for clear juice; texture stays thicker |
| Steam juicer | Large batches of clear juice for canning | Hands-off extraction on the stove, produces clear, cooked juice | Takes more time and heat; meant for preserving, not fresh raw juice |
| Dedicated wheat grass juicer | Small 1–2 oz wheatgrass or leafy green shots | Designed for tough, fibrous greens; often manual and compact | Not ideal for mixed fruit-and-veg juices; usually a second device |
| Commercial cold-press juicer | Juice bars, households making many bottles at once | Built for continuous, heavy use and higher yield | Bulky and expensive, more than most home kitchens need |
Centrifugal juicers spin a sharp filter basket at high speed, which works well for hard produce and quick glasses but makes more foam and faster-oxidizing juice. Masticating or cold-press machines use a slow auger to crush produce, so they tend to give higher-quality juice with less foam and are much better for leafy greens and wheatgrass.
Many masticating juicers and some centrifugal models send pulp out one side into a pulp bin while juice flows from the front spout into a jug, which helps when you juice several 8–12 oz servings in a row. If you juice daily for several people or run a side business, that continuous pulp ejection and a sturdier build are what push you toward heavier-duty or commercial cold-press equipment like you might see with cold-press juicing for business.
Wide-chute and “whole-fruit” juicers, including Nama-style and susteas juicer designs, have large feed openings so you can drop in whole apples or big chunks with less chopping. You still need to cut away bruised areas, remove pits and thick cores, and halve very large or fibrous items like beets or cabbages so the auger or blade does not jam.

Citrus juicers and manual squeezers have a simpler setup and are often the best choice if you mainly want orange juice or lemon and lime for cooking. An electric orange juicer machine usually has just a base, a reamer cone, a small strainer, and a juice collector, so it goes together in seconds and is easier on the hands than a handheld orange juicer or manual press when you squeeze several oranges at once.
A steam juicer is more like a multi-level pot than a countertop appliance, using boiling water and steam to extract juice for canning; if you are curious about clear, shelf-stable juice, you can read more about what a steam juicer does and decide if you ever need one beyond fresh daily glasses.
Dedicated wheat grass juicers, often manual clamp-on models with a small horizontal auger, are helpful if you regularly drink 1–2 oz wheatgrass shots and find that regular juicers struggle with the tough blades of grass.
Prep, Storage and Juicer Food Safety
You keep juicing food-safe by washing produce well, keeping parts clean, chilling juice quickly, and treating blades with respect, whether you use a home countertop juicer, a professional cast iron press, a steam juicer, or a commercial machine. Fresh homemade juice is safest and tastes best within about 24 hours in the fridge; for most healthy adults, a clean, well-chilled batch can be kept up to about 72 hours. Juice that sits at room temperature for more than 2 hours should be thrown away to cut the risk of bacterial growth. Pregnancy, young children, older adults, and anyone with a weaker immune system do better with small portions of same-day juice only, or with pasteurized juices.
A professional cast iron juicer that presses citrus by hand, a centrifugal or masticating home juicer, and many commercial juicers all make unpasteurized juice, so the same washing and storage rules apply. Steam juicers heat fruit to release juice; follow tested canning directions if you bottle that hot juice, and once it cools for drinking, refrigerate it promptly and handle it like any other homemade juice.
Wash and Prep Produce Safely
You prep fruit and vegetables for safe juicing by rinsing them under running water, even if you plan to peel them. Scrub firm items like apples, carrots, and cucumbers with a clean produce brush to remove soil. Peel citrus, kiwi, melons, and any waxed or inedible peels; peels you normally eat, like apples or pears, are usually fine to leave on once washed. Cut away bruised or damaged spots, and avoid juicing anything moldy. Skip soap or bleach on produce; plain water works well for most people.
Store Fresh Juice Cold and Covered
Pour fresh juice into a clean, airtight container, filling it as close to the top as you reasonably can to limit air contact. Get it into the refrigerator within about 30 minutes of making it, and keep your fridge at or below 40°F (4°C). Most people do best drinking homemade juice the same day or by the next day; for healthy adults with clean technique, up to about 72 hours is a reasonable upper limit if the juice has stayed cold. Don’t mix fresh juice into an older batch, and discard any leftover juice after 3 days.
Handle Blades, Filters and the Chute Safely
Sharp parts on any juicer can cut skin quickly, so always turn the power off and unplug the machine before you reach near the blade, filter basket, or chute. Keep fingers and utensils out of the feed tube; use the pusher that came with the juicer instead of a spoon, fork, or your hands. Keep children away from the juicer while it’s running, and don’t remove the lid or safety lock until the spinning parts have completely stopped.
The motor base on any juicer stays out of the sink and dishwasher; wipe it with a damp cloth. Many pulp bins, juice pitchers, lids, and some filter baskets can go on the top rack of the dishwasher, but some fine mesh parts can warp or dull there, so the safest approach is to check your manual before loading anything. A good routine is to rinse parts right after juicing, soak them in warm, soapy water for 5–10 minutes, then use a soft brush (often included with the juicer) to clean the mesh filter from the inside out.
If pulp or juice has dried on the parts, or the juicer sat dirty for a few hours, give food-contact pieces a deeper clean: wash them, then soak in a standard kitchen sanitizing solution made with unscented bleach, following the label directions, and let them air-dry completely before reassembling. That extra step is especially helpful if someone in the household has recently had vomiting or diarrhea.
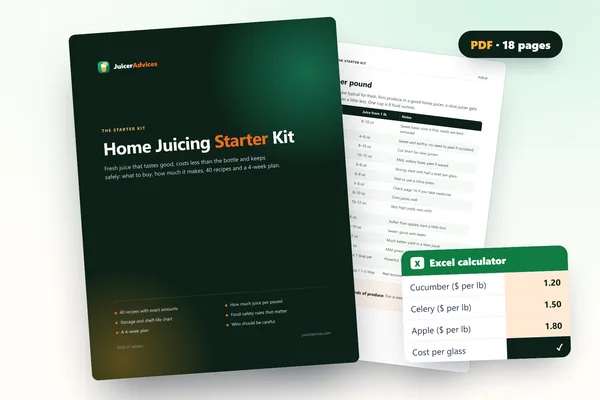 Home Juicing Starter KitMake fresh juice that tastes good, costs less and keeps safely: 40 recipes with exact amounts, a yield chart and a 4-week plan.40 juice, smoothie and shot recipesYield, storage and food-safety chartsCost, yield and shopping-list calculator (Excel)
Health-Friendly Juice Variations for Common Needs
Health-friendly juicing means smaller servings, more vegetables than fruit, and tailoring ingredients to your blood sugar, stomach, and kidneys instead of copying every “detox” recipe you see online.
For a simple Breville juicer lemonade recipe that treats blood sugar gently, juice about 2 peeled lemons with 1 small apple or a few grapes for sweetness, then dilute that concentrate with 3–4 cups of cold water or sparkling water; aim for about 4–6 oz of the final lemonade per serving rather than a giant glass.
Blenders and juicers work differently for health: a blender keeps all the fiber as a smoothie, while a juicer removes most fiber and leaves mostly liquid, so juice generally raises blood sugar faster than blended or whole fruit.
People watching glucose usually do best with about 4–6 oz (half to three‑quarters of a cup) of juice at a time, ideally with a meal or snack that includes protein and fat so the sugar enters the bloodstream more slowly.
For a lower-sugar pattern, build each 8–12 oz serving mostly from non-starchy vegetables like cucumber, celery, fennel, and leafy greens, then add only one small piece of fruit (such as half an apple, a small kiwi, or a handful of berries) for flavor.
Gentler-on-the-stomach variations lean on low-acid produce such as cucumber, peeled melon (if tolerated), and carrots, and skip big amounts of lemon, orange, pineapple, or strong ginger if you live with reflux or gastritis.
People with kidney disease who’ve been told to limit potassium often need to go easy on high-potassium juice ingredients such as large amounts of orange, beet, spinach, and tomato, and follow the specific produce list from their renal team for what’s safe and how much fits in a day.
Some readers prefer “juice spritzers”—half juice, half sparkling water—or tiny 2–3 oz juice shots taken alongside a meal, rather than sipping juice by itself on an empty stomach.
| Drink | Sugar per serving | Servings | Total |
|---|---|---|---|
| 8 oz fruit-heavy apple–orange juice | 24 g | 1 | 24 g |
| 8 oz veggie-forward cucumber–celery–lemon juice with 1/2 app | 10 g | 1 | 10 g |
| Total | 34 g | ||
| Approximate daily added-sugar target for many adults (naturally occurring sugar still affe (25 g) | 136% | ||
Juicing Mistakes and How to Fix Them
Common juicing mistakes—like feeding produce too fast, using the wrong ingredients, or storing juice poorly—can usually be fixed with a few small technique changes.
Many of the “12 tricks and tips for using a juicer” boil down to slowing your pace and watching feedback from the machine: if pieces are large or you’re stuffing the chute, clogs and low yield follow.
To troubleshoot common problems, start with the basics: cut produce to fit easily in the chute, feed pieces one at a time, and alternate soft items (like citrus segments) with firmer ones (like carrots or apples) so the auger or blade keeps pulling food through.
Stringy or very starchy items such as pineapple cores, huge kale stems, bananas, and avocados tend to smear and bog down filters; bananas, avocados, most dried fruits, very tough pits or stones, and very fibrous peels are best left out of the juicer and used in a blender or cooked recipe instead.
If the motor slows, stops, or you smell burning, stop immediately, unplug, clear the pulp and filter, and check the manual rather than forcing the machine—even a sturdy model like a Champion- or Oscar-style juicer can overheat if pushed.
Yield varies by design: masticating juicers often squeeze noticeably more juice from leafy greens and hard roots than centrifugal models, and running the pulp through once more in either type can pull out extra liquid.
To minimize oxidation and foaming, use well-chilled produce, choose a slow-speed or masticating juicer when you can, juice more vegetables and fewer foamy fruits like pineapple, then fill jars to the very top, cap tightly, and skim off any thick foam before storing.
Flavor hiccups usually trace back to too many strong players—ginger, lemon, lime, beet, or very bitter greens—so build around one main note (such as carrot, apple, or cucumber), add intense ingredients in tiny amounts, and taste after every few pieces.
Questions like “are there produce items that should never be juiced” or “tuumiist juicer review” and “fretta juicer pros and cons” come up often; no matter the brand, the safest list of do’s and don’ts is always in your own manual.
Heavy-duty machines, including some classic Champion-style or Oscar juicers, sometimes have attachments for nut butters or even grinding meat; only use those functions if the instructions specifically describe how, and wash and sanitize thoroughly afterward so raw meat residue never touches fresh juice.
Those same workhorse models also do well with thicker mixtures like tomato sauce or ground-fruit bases for champion juicer recipes, but switch back to the standard juicing setup before your next batch of fresh produce.
Anyone wondering “how do you minimize oxidation and foaming” or “how to troubleshoot common problems” can think in three buckets: slow down the feed, match the produce to the right juicer type, and stop, unplug, and reset if you see frequent clogs or hear straining.
Questions about specialized tasks such as trying to grind meat with an Oscar juicer are another reason to read the fine print; if that use isn’t clearly approved, stick to produce and use a dedicated grinder for meat instead.
Your Quick Pre-Juicing Checklist
A short checklist before you switch on any juicer keeps each batch safer and easier, no matter who’s drinking it. That holds for a commercial juicer in a cafe or the “best juicer machine” at home, and it still applies while you compare an Omega juicer vs Nama juicer or check where to buy breville juicer.
If you’re still choosing a machine, browse home juicers for regular use for type and size, then the secret to the smoothest juice if low-pulp texture is your priority. For single glasses of lemon water or tea, a small handheld citrus juicer is often easier than assembling a full electric machine.
