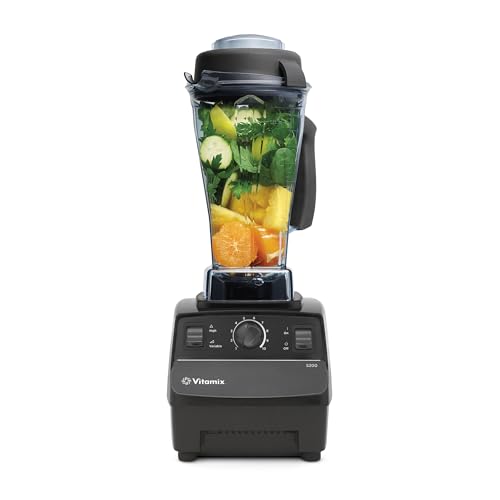
Yes, your Vitamix blender can make dough, but only certain models handle it well. This isn’t just about tossing flour and water into a pitcher. You need the right technique, container, and expectations. A blender blade cuts and spins at high speed—very different from the slow, folding action of a stand mixer. Let’s break down exactly how to do it, what models work best, and where a Vitamix falls short versus a dedicated kneading machine.
For a completely different kind of shaping, many home stylists also rely on Hair Dough Styling paste for molding and texturing hair with precision. It’s a similar principle—creamy consistency, strong hold, and easy molding right from the jar.

How Vitamix Blenders Can Make Dough
Most people assume a blender only liquefies smoothies. But a high-performance Vitamix blender generates enough torque to pull flour and water together into a shaggy dough ball in seconds. The key is the vitamix wet container and its tamper.
The Science of Gluten in a High-Speed Blender
Dough forms when water hydrates flour proteins (glutenin and gliadin) and movement develops gluten strands. A high speed blender dough method accelerates hydration dramatically. The blade instantly disperses water molecules, so gluten develops faster than hand-kneading. However, friction also heats the mixture. You risk overheating the dough if you run the machine too long.
Motor power matters enormously here. A standard blender stalls under thick dough. Vitamix motors—ranging from 2.0 to 2.2 peak horsepower—have the thermal protection and torque to handle dense loads. Still, they aren’t infinite. We’ll cover model specifics shortly.
Which Doughs Work Best?
- High-hydration doughs (65%+ water): Pizza dough, focaccia, ciabatta. These are looser and move easily. Ideal for a blender.
- Quick breads and batters: Banana bread, muffin batter. Almost no strain on the motor.
- Cookie doughs: Soft, drop-style cookies work well. Stiff, rolled doughs are a struggle.
- Low-hydration doughs (under 60% water): Bagels, stiff pasta dough, hard roll dough. These resist blade movement. Risk motor burnout. A stand mixer is safer here.
Step-by-Step Guide to Making Dough in a Vitamix
Let’s walk through a basic vitamix pizza dough recipe. You’ll see the process mirrors, in some ways, what a food processor does.
- Scale ingredients precisely. Use a kitchen scale. For a 70% hydration pizza dough: 500g bread flour, 350g warm water, 10g salt, 1 teaspoon instant yeast. Dough hydration levels impact blending safety significantly.
- Add wet ingredients first. Pour warm water into the vitamix wet container. Add yeast. Let it bloom for 5 minutes if using active dry yeast.
- Add dry ingredients. Flour and salt on top. Do not overload. Total flour should never exceed 3 cups (375g) in a standard 64-ounce container. Blending thick vitamix bread dough in larger batches will stall the motor.
- Start on Variable Speed 1. Switch on and quickly increase to Speed 2 or 3. Never jump straight to high. Watch the mixture.
- Use the tamper immediately. The blade will throw flour to the sides. Push ingredients into the blade continuously with the tamper through the lid plug. This is non-negotiable. Without the tamper, the dough just sticks.
- Blend for 30–45 seconds maximum. Watch for a dough ball to form and rotate. The moment the dough cleans the sides and spins as a mass, stop. Over-processing builds too much heat and dangerously develops gluten into a tight, unworkable brick.
- Remove and hand-knead briefly. The blender does the initial mix. Turn dough onto a floured surface. Knead by hand for 1 minute to feel the texture. It should be smooth but slightly tacky. The final knead ensures proper structure.
Many who make fresh dairy alternatives at home explore our guide to preparing fresh soy milk. The blending principles for even hydration transfer nicely to dough techniques.
Best Vitamix Models for Dough
Not every Vitamix is built equally for heavy lifting. The question “what vitamix model is best for making dough” comes down to motor control and presets.
| Model | Suitability | Why |
|---|---|---|
| Vitamix 5200 | Excellent | Variable speed dial gives precise control. Tall container funnels ingredients into the blade naturally during dough mixing. |
| Vitamix A3500 | Excellent | 5 presets including a dedicated “Dough” mode. Automatically ramps speed and stops. The self-cleaning program is useful after sticky dough. |
| Vitamix E310 Explorian | Good | Shorter, wider 48-oz container. Slightly harder to keep small batches moving but great torque. |
| Vitamix Venturist V1200 | Good | Wireless connectivity and app-based dough programs. Same motor base as A3500, different control interface. |
| Legacy Vitamix 7500 | Moderate | No variable-speed dial (1-10 switches). Harder to pulse exactly for dough; easier to overshoot blade speed. |
The vitamix dough attachment doesn’t exist as a separate tool—the tamper is effectively your only “attachment” for dough. Some users wonder about a specialized dough blade, but Vitamix only provides the standard wet blade. It works when used correctly.
Can a Vitamix Replace a Stand Mixer for Bread Dough?
This is the real conversation. Can a vitamix replace a stand mixer for bread dough? In short: partially, but not entirely. A blender excels at quickly combining ingredients for wetter doughs. It does not perform the slow, rhythmic kneading that completes gluten development. For daily sandwich bread where you need a supple, windowpane-tested dough, a KitchenAid with a dough hook remains superior.
Tips for Successful Dough in a Vitamix
Hydration and Capacity Limits
If you’re using a blender for dough, follow the 60% hydration minimum rule. Stiffer dough won’t circulate. Also, ignore “max fill” lines for liquids. The actual dough capacity is roughly half the pitcher. Attempting a double batch of stiff dough stresses the motor and often leaves unincorporated flour in the corners.
Temperature Control
The friction from a high speed blender dough can push yeast doughs over 100°F in under a minute. Use cold water (instead of warm) during summer months. If the dough feels hot after blending, let it rest in a cool bowl to slow fermentation before the first rise. Overheating kills yeast and ruins flavor.
Safety Considerations
Is it safe to knead dough in a blender? Mechanically, yes, if you stay within recommended loads. The Vitamix motor base includes thermal overload shutoff. If the machine stops, turn off the power switch and wait 30 minutes for it to cool. Do not force the motor back on. Repeatedly overheating will degrade the motor over time. The blade seal is also vulnerable to thin flour paste seeping under. Check for gritty residue behind the blade and clean the container immediately after use.
Our deep dive on making homemade ice cream demonstrates how far blade friction can go—similar concepts apply when you want dough that doesn’t overheat.
Comparison: Vitamix vs. Stand Mixer for Dough
The vitamix vs stand mixer dough debate isn’t about one winning overall. It’s about task matching.
| Factor | Vitamix Blender | Stand Mixer (KitchenAid) |
|---|---|---|
| Speed of mixing | Seconds | 8–12 minutes |
| Gluten development | Rapid but uneven; risk of over-shearing | Slow, controlled, superior elasticity |
| Batch size limit | ~3 cups flour max | 8+ cups flour depending on bowl lift |
| Dough types | High-hydration, batters, cookies | Everything, especially stiff bread doughs |
| Clean-up | Blade groove requires immediate attention | Bowl and hook wash easily |
| Secondary uses | Smoothies, soups, nut butters, plant milks | Whipping, mashing, grinding (with attachments) |
Motor power comparisons reveal the functional difference. The Vitamix spins a blade at 240+ mph at the tip—a violent, cutting force. The KitchenAid spins a dough hook at roughly 100 rpm—a folding, stretching force. You cannot replicate a dough hook’s action in a blender. But you can replicate the first crucial step: combining flour and water flawlessly in under a minute.
A practical workflow for serious bakers: use the Vitamix blender to autolyse (mix flour and water only) and hydrate the dough instantly. Pour that shaggy mass into a stand mixer bowl, add yeast and salt, and let the dough hook finish the knead. This hybrid approach cuts total mixing time by half and nearly eliminates flour dusting your counter.
Blade Stress and Longevity
When you blend dough in vitamix, the extreme density bends the blade assembly very slightly over many cycles. This is normal wear. You’ll eventually hear a rattling sound or see wobbling. The drive socket replacement is simple and costs around $40. Stand mixers rarely need blade replacement but may need gear grease repacked over time.
Fresh, homemade bread pairs beautifully with clean eating habits. According to expert nutrition guidelines from Harvard’s School of Public Health, whole-grain foods and balanced ingredients support long-term wellness—something to keep in mind when choosing your flour and dough recipes.
Final Thoughts
Your Vitamix absolutely can make dough—soft, wet doughs like pizza and focaccia turn out beautifully in under a minute. The tamper isn’t optional; it’s essential. Stiff doughs still belong to a KitchenAid. Pick your tool based on hydration and batch size. If you only make occasional pizza nights, your blender handles it perfectly. If you’re a daily bread baker, a stand mixer earns its counter space. Either way, understanding the limits of blade-based mixing prevents disappointment and broken motors.