The best blender for meat for most readers is a food processor combo with a strong motor, a sturdy bowl, and pulse control because meat needs short bursts, not a long spin. A regular countertop blender can struggle with texture, heat, and cleanup; the safest choice is the one that keeps the meat cold and stops on command.
The essentials
Choose a food processor combo if you want the most reliable texture for raw meat and vegetables in one appliance.
Pick a dedicated meat grinder if your main job is ground meat and you want the least guesswork.
Use a stainless steel bowl for raw meat prep if you want durability and easier chilling; glass works too, but only if the listing allows safe temperature limits.
Keep meat cold, cut it into 1-inch cubes, and use pulse in small batches so the blades chop instead of smear.
Clean every removable part right away after raw meat, and keep the motor base dry.
Most people go wrong by buying the most powerful blender they can find and expecting it to behave like a meat grinder. That usually gives you paste, warm meat, or a stalled motor instead of cleanly chopped beef.
The better question is which appliance matches the job: burgers, meatballs, pet food, or quick chopping with vegetables. For raw meat, the right bowl material, blade style, and batch size matter as much as wattage.
Best Picks For Grinding Meat At Home
#1Best Overall
VegeNutrix Food Processor Blender Combo
Best for most home cooks grinding meat in batches
This one gives you a 1000W motor, a 12-cup processor bowl, and a separate 70-oz glass jar, so you can keep meat work in the bowl and liquids in the blender. The dedicated chopping, slicing, shredding, and dough blades give you more control over texture than a single-purpose blender. Pulse mode also helps you stop before the meat turns paste-like.
Motor 1000WProcessor bowl 12-cup Precision Processor BowlGlass jar 70 ozControls 2 speeds and pulseSafety Double Lock Safety System
Why it made the cut
Large processor bowl for small or medium meat batches
Best for larger meat batches and heavier kitchen jobs
A 1500W motor and an 8-cup processor bowl make this the strongest option in the group for tougher prep jobs. The separate processor bowl is the better place for meat than the 72-oz pitcher, and the single-serve cups can help if you want to portion sauces or marinades right away. Four functions also give you more control when you move from chopping to blending.
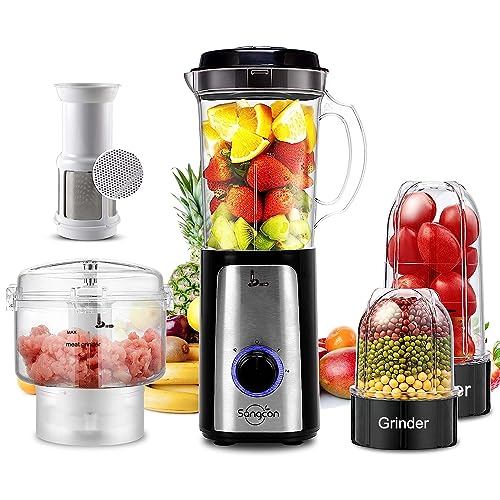
The 2.5-cup chopper bowl is the most compact meat-friendly option here, and the S-blade is made for chopping meat, vegetables, herbs, nuts, and sauces. Two speeds plus pulse give you short bursts, which is exactly what meat prep needs. The lock design and suction feet add a little more stability on the counter.
Pitcher 47 ozChopper bowl 2.5-cupCups 18 oz and 11 ozControls 2 speeds + pulseSafety Lock design, suction feet, overheating protection
Why it made the cut
Compact bowl is easier for small meat batches
S-blade is listed for meat chopping
Pulse control helps avoid overprocessing
Good to know
Small bowl limits batch size
60-second run limit means you need to work in short rounds
Skip it if Skip it if you want to process a family-sized batch of meat at once.
This immersion blender gives you 1000W and 16 speed settings, so you can move from gentle mixing to more forceful blending without changing tools. The 600 mL chopper is useful for very small amounts, and the included beaker helps with sauces, marinades, or purees alongside meat prep. It is a decent helper, but it is less suited to raw meat than a true food processor bowl.
Motor 1,000W pure copper motorSpeed settings 16Chopper 600 mLBeaker 800 mLBlade 4-blade stainless steel cutting assembly
Why it made the cut
Handheld design takes little storage space
16 speeds give fine control
Includes a 600 mL chopper and 800 mL beaker
Good to know
Not as steady for raw meat as a bowl-style processor
Smaller attachments limit batch size
Skip it if Skip it if you want to mince raw meat regularly or need a larger, enclosed bowl.
The 8-inch blending arm and variable speed trigger make this a handy tool for soups, shakes, and smooth sauces. For meat, though, it is the least direct fit because it does not include a chopping bowl or a meat-specific blade set. The 3-cup jar is fine for tiny batches, but it leaves you doing the cutting by hand first.
Blending arm 8 inJar 3-cup BPA-free blending jar with lidBlade 4-point stainless steel bladeControl Variable speed triggerGuard Removable pan guard
Why it made the cut
Easy to store
Variable speed trigger gives basic control
Blending jar can serve or store small amounts
Good to know
No meat chopper bowl included
Small jar is not ideal for raw meat prep
Skip it if Skip it if your main goal is grinding or mincing meat at home.
The best blender for meat for most readers is a combo-style food processor with a processing bowl and pulse control, not a smoothie pitcher. Meat needs short bursts, and cold pieces chop cleaner because long spinning warms the fat and turns the texture pasty.
A regular countertop blender can still handle small amounts if it has strong blades, a sturdy base, and true pulse control. Many models overprocess meat into a paste before you can stop them, and a long spin can heat the meat enough to blur the texture.
If you’re comparing a blender meat grinder household setup, buy the food processor or combo first, a dedicated meat grinder second, and an immersion blender only for tiny chopped jobs or sauces with cooked meat. A blender electric meat grinder sounds flexible, but the better choice depends on how often you grind and whether you also want to chop onions, herbs, or breadcrumbs in the same bowl.
Good for
Burgers, meatballs, or taco filling in short pulses.
Mixed prep with onions, herbs, garlic, or breadcrumbs.
A machine that stops on command instead of running through a full smoothie cycle.
Not for
A very fine, uniform grind every time.
Large or frequent meat batches.
A tall smoothie jar with no pulse button or processing bowl.
Match The Tool To The Dish
The right tool depends on the dish. Burgers usually want a finer, even grind, meatballs can handle a slightly coarser chop, and mixed prep with onions and herbs works best in a combo bowl because the add-ins and meat stay together instead of smearing against a tall jar wall.
From JuicerAdvices · our own guideChoosing or using a juicer? Page 3 compares the types; page 15 fixes the common problems.Home Juicing Starter KitMake fresh juice that tastes good, costs less and keeps safely: 40 recipes with exact amounts, a yield chart and a 4-week plan.40 juice, smoothie and shot recipesYield, storage and food-safety chartsCost, yield and shopping-list calculator (Excel)$14.99$9.99Get it for $9.99See what's inside and watch the 2-minute video →18-page printable PDF + Excel calculator · instant download · 30-day refund
What Specs Matter Most
Power matters, but blade control and bowl choice matter just as much when you want ground meat, not paste. Around 700W can work for lighter prep, while 1000W and 1500W models have more reserve for tougher cuts and bigger batches. A meat grinder gives you a more even mince by pushing meat through a plate, while a food processor chops with blades, so it gives you more flexibility and more chances to stop at the right texture. Stainless steel is the better default for meat prep because it chills well and holds up to frequent washing; glass can work only if the listing gives a safe temperature limit and you keep hot water out of the bowl.
Spec
What to look for
Why it helps with meat
Motor power
Around 700W for lighter prep; 1000W and 1500W for tougher cuts and bigger batches
More reserve means fewer stalls and less extra spinning.
Blade design and control
Stainless steel blades plus pulse and manual speed control
Short bursts help you stop before the meat turns mushy.
Bowl material
Stainless steel for durability and chilling; glass only with a stated safe temperature limit
Colder bowls help keep fat firmer and texture cleaner.
Capacity
Smaller bowls for easier chilling; larger bowls for burger batches
Choose size by batch, not by the biggest number on the box.
Safety features
Double lock, auto-stop, and overheat protection
Raw meat often needs several short runs instead of one long blend.
How to read the specs without getting distracted by extra wattage or extra accessories.
More watts won’t save sloppy control. A machine with 1000W and a good pulse button often handles meat better than a higher-watt model that only runs on one speed, because you can stop before friction warms the batch. If bowl size is confusing, the capacity guide shows how listed ounces translate to usable working room.
Glass Bowl Limit
Glass bowls are fine only if the listing gives a safe temperature limit. One example sets that limit at 149°F (65°C), so don’t pour hot water into the bowl unless the manual says it’s okay.
Pulse And Stop Fast
Use pulse or manual speed control if the machine has it. One-touch is simpler, but short bursts let you check texture before the meat goes from chopped to mushy.
How To Prep Meat Before Blending
Raw meat should be trimmed, cut into 1-inch cubes, chilled below 40°F, and pulsed in short bursts so it stays cold enough to chop cleanly. A short chill helps if the meat gets soft, but a rock-solid block can strain the motor and leave uneven pieces.
1
Trim the meat
Remove bones, skin, fat, or gristle before you start. Hard bits can jam the blades, and extra fat softens as the bowl warms, which makes the texture looser.
2
Cut it evenly
Aim for uniform 1-inch cubes so every piece meets the blades at the same time. Mixed sizes leave some chunks too large and some bits closer to paste.
3
Keep it cold
Hold the meat below 40°F, and set the processing bowl inside a larger bowl filled with ice if you can. A stainless steel bowl helps carry the chill, which slows smearing.
4
Use small batches
Work in small batches so the blades can cut instead of pack the meat down. Very wet meat and an overfilled bowl turn sticky faster, while dry, cold pieces give cleaner chops.
5
Pulse briefly
Use short pulses or manual control instead of a long run. Pause as soon as the mixture starts to smear or feel sticky, then chill it again before you continue.
6
Stop when it warms
If the bowl starts to feel warm, stop the motor and let everything cool before you go on. A short freeze can help if the pieces have softened, but rock-solid blocks can strain the motor and give uneven results.
Cold beats wet
A wax paper-lined baking sheet is handy if you need to chill the cut pieces again for a short time. Very wet meat moves toward paste faster, so blot excess moisture and keep the bowl only partly full.
Unplug First
Unplug the appliance before you clear a jam, lift out blades, or move the bowl. Never reach near moving parts, even if the motor sounds slow or the lid looks loose.
Worked Example
Say you prep 1 lb of chicken thighs by trimming the fat, cutting 1-inch cubes, and chilling them below 40°F. Process them in a small batch; if the mixture starts to smear or the bowl feels warm, stop, cool the pieces, and finish in another short round.
Cut size1-inch cubes
Temperaturebelow 40°F
Batch sizesmall batches
Which Pick Fits Your Kitchen
In short
The best meat blender for most homes is an all-in-one food processor combo because it handles meat, salsa, and vegetables in one base and gives you more control than a smoothie pitcher. If you want the strongest full-size option, look for a processor-and-blender system with 1000 peak watts or more and a real pulse setting.
Good for
Mixed meal prep when you want one machine for meat, chopped vegetables, and dips
Bigger batches if you also want dough, shredding, or blending from the same base
Small kitchens that need one appliance to cover more than one job
Not for
Soft, smoothie-style pitchers that leave you fighting the shape of the jar
Very small mini units if you plan to grind large batches
Any setup without a pulse control, since meat turns mushy fast
A dedicated meat-first appliance should favor a processor bowl over a smoothie pitcher. A wide opening, a sturdy bowl, pulse control, and parts that rinse fast make the job easier because meat moves in short bursts, not a long whirl.
Useful here
Food Processor and Blender Combo, 88 oz Food Chopper, 1000W
The Food Processor and Blender Combo, 88 oz Food Chopper, 1000W fits readers who want a larger base for meat, vegetables, and everyday chopping in one machine. Its 1000W rating and big 88 oz bowl make it a stronger choice for batch prep than a small personal blender.
Ninja Mega Kitchen System, 1500W, 72oz Pitcher, 8-Cup, Black, BL770
The Ninja Mega Kitchen System, 1500W, 72oz Pitcher, 8-Cup suits people who want the most power in this group and plan to use the same base for chopping, blending, and larger meal-prep jobs. A stronger motor helps when you work through more meat, but a pitcher shape still makes it less natural than a processor bowl for meat-first use.
Ganiza Immersion Blender 5 in 1 Hand Blender Max 1000W Heavy Duty Mot…
The Ganiza Immersion Blender 5 in 1 Hand Blender Max 1000W makes sense for small, quick tasks like cooked meat in sauces or very light chopping. It is the easy grab-and-go choice, but it is not the one to pick for raw meat grinding.
Smaller, easy-clean units suit occasional meat prep and tight counter space, but they reach their limits sooner and can warm up if you push past a small batch. That is where a food multifunctionfood blender electric meat grinder style combo helps, because it keeps the workflow in one bowl and is easier to stop and check.
Before You Buy
Choose a processor bowl if meat is the main job
Look for pulse or manual control, not only a single-speed switch
Pick a bigger base if you want dough, chopping, and blending too
Favor easy-to-rinse parts if you cook meat often
Skip a pitcher-first design if you want the most even meat texture
Clean Up Safely After Raw Meat
In short
How do you clean a blender or food processor after raw meat? Wash every removable part right away, keep the base unplugged and dry, and clean the blades and lid seals carefully because meat fibers hide in those spots. Then wipe the motor base, counter, and handles you touched so raw juices do not spread.
1
Unplug and separate parts
Pull the plug before you touch the jar, bowl, blade, or lid. The base stays dry; only removable parts go to the sink.
2
Wash the hidden spots
Rinse blades, lids, gaskets, and the hub under the blade with hot soapy water if the listing allows hand washing. Meat can hide under seals and around the blade mount, so slow down there.
3
Use the right cycle
If the product says dishwasher-safe, you can use that cycle. If it does not, stick with hand washing so heat does not warp the bowl or dull parts.
4
Dry fully before storing
Let every washed piece dry completely before you put it away. Trapped moisture can leave smells and make the next cleanup harder.
5
Sanitize the work area
Wipe the motor base, nearby counters, cabinet pulls, and any handle you touched during prep. Raw meat juice can spread farther than you think, especially on a busy counter.
A small habit that helps
Set a clean towel and a dry drying rack next to the sink before you start. Once the meat is processed, you can move straight into washing instead of setting raw parts back on the counter.
Before Your Next Batch
Base unplugged and wiped dry
Blade, lid, gasket, and bowl washed right away
Dishwasher only used if the listing allows it
Every part fully dry before storage
Counter, handles, and nearby surfaces wiped clean
Hands washed after handling raw meat and cleanup tools
More Questions, Answered
Can a regular blender safely grind raw meat?
A regular blender can handle raw meat in very small batches, but only if it has true pulse control, a sturdy jar or bowl, and enough power to move the pieces without packing them down. Smoothie pitchers often turn meat into a paste faster than you’d expect. Keep the meat cold and stop as soon as the texture looks coarse.
What is the difference between a meat grinder and a food processor for meat?
A meat grinder usually gives you the most even grind and less smearing, so it’s the better pick if you make burgers or sausage often. A food processor is more versatile and easier for occasional meat prep, but it can overprocess meat if you run it too long. Choose the grinder for texture and the processor for flexibility.
Can you grind frozen meat in a blender or food processor?
Cold meat is fine, but rock-hard frozen meat is a poor fit for most blenders or food processors because it can stress the motor and leave uneven chunks. Aim for firm, chilled pieces that cut cleanly instead of a solid block. If the meat starts warming up, pause and chill it again before you keep going.
How do you clean a blender after raw meat?
Unplug the appliance before you take it apart, then wash the bowl, blades, lid, and gasket with hot soapy water or use the dishwasher if the maker says they’re dishwasher-safe. Don’t forget the underside of the blade assembly and any splash area that touched raw meat. Dry every part fully before you store it.
Before you go · a welcome giftGet the Home Juicing Starter Kit for $4.99Make fresh juice that tastes good, costs less and keeps safely: 40 recipes with exact amounts, a yield chart and a 4-week plan. Normally $14.99; your welcome price saves $10.00. We'll email your link right now.or skip the email and buy it now for $4.99 →One email with your link now. We never share your address.




 Home Juicing Starter KitMake fresh juice that tastes good, costs less and keeps safely: 40 recipes with exact amounts, a yield chart and a 4-week plan.40 juice, smoothie and shot recipesYield, storage and food-safety chartsCost, yield and shopping-list calculator (Excel)