Vitamix Turns On but Won’t Blend: How to Fix It Step-by-Step
10 min read
At a glance
The most common cause when a Vitamix turns on but won’t blend is a worn or damaged drive socket or blade assembly. Start by unplugging the blender and inspecting these parts carefully for wear or obstruction before trying to reset any internal fuses or buttons.
A Vitamix blender that powers on but won’t blend usually signals a mechanical issue rather than a motor failure. The drive socket, a plastic coupling that connects the motor to the blades, often wears out after years of use and stops spinning the blades effectively.
Ignoring this problem risks further damage to the blender’s motor or blade assembly, which can be costly to repair. Our guide walks you through quick checks and safe fixes to get your blender working again without guesswork or unnecessary expense.
Key takeaways
The drive socket is the most common cause of blades not spinning despite the motor running.
Always unplug the blender before inspecting or attempting any repairs to avoid injury.
Reset the internal fuse or overload protection by unplugging and waiting 60-90 minutes before trying again.
Proper container seating is essential; the safety interlock prevents blending if the container is not seated correctly.
If the blades are jammed by food debris, clear it carefully to avoid damage or injury.
Common Reasons Your Vitamix Turns On but Won’t Blend
A Vitamix blender that powers on but won’t blend usually has a worn drive socket or a blade assembly problem. These parts connect the motor to the blades, so when they fail, the motor runs but the blades don’t spin.
If your Vitamix 5200 won’t turn on at all, check the power cord and outlet first before looking inside the blender base. To turn on most Vitamix blenders, you need to ensure the container is properly seated and the safety interlock system is engaged.
Start troubleshooting by unplugging the blender to avoid accidents, then check that the container sits firmly on the base; if it’s off-center, the blender won’t start blending. The safety interlock prevents operation if the container or lid isn’t correctly positioned.
Inspect the drive socket—the plastic coupling at the container’s bottom that connects to the motor shaft. Over time, this socket can wear down or crack, preventing blade rotation even while the motor runs. Worn blade assemblies can also jam or spin loosely, stopping proper blending.
If the blades feel stuck, debris might be jamming them. Carefully unplug the blender and remove the container to avoid blade injury before checking for obstructions. Avoid forcing the blades by hand or running the blender empty, which can worsen damage.
Your Vitamix has an internal fuse or reset button that trips if the motor overloads or overheats. Unplug the machine and wait 60 to 90 minutes before pressing the reset button or plugging it back in to see if blending resumes.
Don’t forget to inspect the power cord for frays or breaks and test the electrical outlet or circuit breaker. A faulty power supply can cause the blender to power on without blending or fail to start.
Safety First
Always unplug your Vitamix before inspecting or handling blades, the drive socket, or any internal parts. The blades are sharp and can cause injury even when the blender is off.
Troubleshooting Checklist
Unplug the blender before inspection
Confirm the container is seated and locked
Check the safety interlock system
Inspect the drive socket for wear or damage
Clear any blade jams carefully
Allow the motor to cool and reset if overloaded
Examine power cord and outlet function
Resetting the Blender
If the Vitamix stops blending after heavy use, give the motor at least 45 minutes to cool down before trying the reset. This helps the thermal protection system reset safely without damage.
Myth
If the motor runs but the blades don’t spin, the motor must be broken.
Fact
Most often, a worn drive socket or jammed blade assembly causes this. The motor may run fine but isn’t transmitting power to the blades.
If your Vitamix turns on but won’t blend, or the 5200 model won’t turn on, these steps identify the most common causes and help you decide if you can fix the problem yourself or need professional help. Follow through carefully, and you can often avoid costly repairs.
Parts and Products to Fix Your Vitamix Blender
Essential replacement parts and recommended models for troubleshooting
Powerful motor base
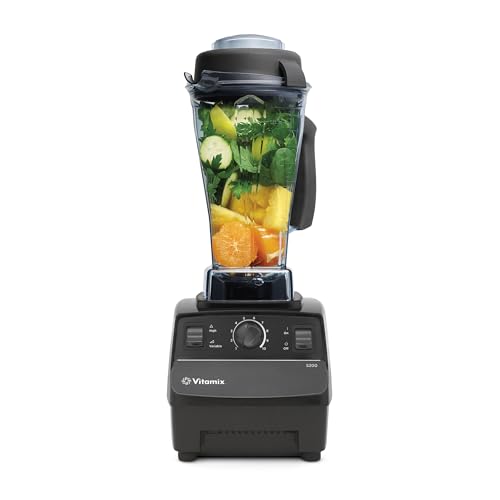
Vitamix 5200 Professional-Grade Blender
The Vitamix 5200 includes a 2 HP motor base and durable stainless-steel blades designed to handle tough ingredients and prevent blending stalls caused by worn drive sockets or blade assemblies. Its large BPA-free container and variable speeds let you fine-tune textures while troubleshooting your blender’s issues.
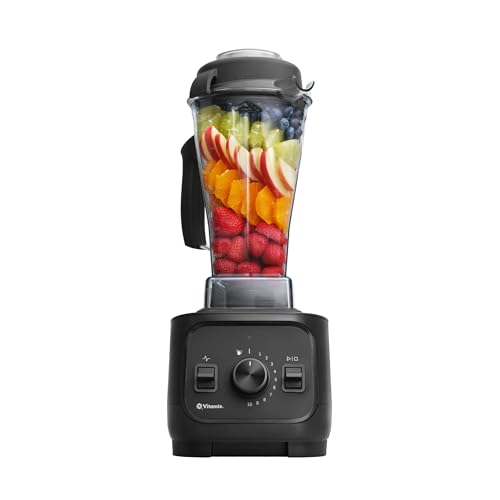
The Vitamix VX1 offers essential Vitamix performance with a powerful motor and durable stainless-steel blades that crush fibrous ingredients efficiently. Its simple controls and self-cleaning program support easy troubleshooting and maintenance when your blender turns on but won’t blend.
A worn or damaged drive socket often causes a Vitamix to turn on without blending. The drive socket is the plastic coupling located at the base of the container that connects to the motor shaft.
Check for signs of wear such as cracks, missing teeth, or a loose fit where the socket meets the motor coupler. If the socket slips or spins freely without turning the blades, it likely needs replacement.
Safety First
Always unplug your Vitamix before inspecting or replacing parts. Avoid touching blades during this process to prevent injury.
1
Locate the Drive Socket
Remove the blending container from the base and turn it upside down to see the drive socket at the container’s bottom center.
2
Remove the Drive Socket
Grip the socket firmly and twist counterclockwise to unscrew it. Use a rubber grip or gloves if it’s tight. Avoid using excessive force to prevent cracking the container base.
3
Install the New Drive Socket
Align the new socket with the threading and twist clockwise until snug. Hand-tighten only; do not overtighten.
4
Test the Blender
Place the container back on the base and run a brief blend cycle with some water to ensure the blades spin properly.
Tool Help
A rubber jar opener can improve grip when unscrewing the drive socket without damaging it.
Most users can safely replace the drive socket themselves with basic hand tools and care. If you notice persistent slipping or damage to other parts, contact Vitamix support.
Fixing Blade Assembly Issues and Clearing Jams
Blades that are hard to turn usually indicate a jam or a problem with the blade assembly bearings or seals. Food debris or hardened buildup can cause blade resistance.
Check and clean the blade assembly to remove jams and buildup for smooth blending.
The blade assembly includes the blades, bearings, and a seal gasket to keep the motor protected from leaks. Inspect the blade bearings and seals for wear, cracks, or leaks if the blades feel stiff.
Food jams often happen when fibrous or sticky ingredients get trapped between the blades and container base. This blocks the blades from turning even though the motor runs.
Clearing Jams Safely
Always unplug the blender before attempting to clear jams. Use a wooden or plastic tool—not metal—to remove debris around the blades to avoid damage or injury.
1
Remove the Container
Lift the container from the base and turn it upside down to inspect the blade assembly.
2
Check for Obstructions
Look for food particles or buildup lodged near the blade or seal gasket. Clear these gently with a soft brush or plastic tool.
3
Lubricate Bearings
If bearings feel stiff, apply a small amount of food-safe lubricant recommended by Vitamix to keep them spinning smoothly.
4
Replace Worn Assemblies
If you detect cracks, leaks, or persistent blade stiffness after cleaning and lubrication, the blade assembly should be replaced.
Prevent Future Jams
Cut tough ingredients into smaller pieces before blending and avoid overfilling the container. Regular cleaning also helps prevent buildup that causes jams.
Resetting the Internal Fuse or Overload Protection
The Vitamix blender includes an internal safety feature that automatically stops the motor if it overheats or faces excessive resistance. This overload protection prevents permanent motor damage by cutting power when the motor gets too hot or strained.
You’ll usually find the reset button on the bottom or back of the blender base, sometimes under a small removable panel or near the power cord entry. Consult your model’s manual if it’s not obvious. To reset, first unplug the blender completely.
1
Unplug the blender
Remove the plug from the electrical outlet to ensure safety while resetting.
2
Wait for motor cooling
Leave the blender unplugged for at least 45 minutes to allow the motor to cool. Some sources recommend up to 90 minutes for full reset.
3
Press the reset button
Locate and press the small reset button firmly. You may feel a slight click.
4
Plug in and test
Reconnect the blender to power and run it without load for a few seconds to check if it blends normally.
Overload protection explained
The internal fuse trips when the motor temperature rises above safe limits or if the motor draws excessive current from blockages. This automatic shutoff helps avoid damage but requires a manual reset after cooling.
Avoid frequent overloads
Prevent overloads by blending smaller batches, avoiding very thick or frozen mixtures without added liquid, and clearing any blade jams promptly.
When to Contact Vitamix Support or Replace Your Blender
Reach out to Vitamix customer service when your blender shows signs of motor or electrical failure that you cannot fix with basic troubleshooting. Warranty service may cover some repairs or replacement parts if your blender is within the coverage period.
Improper container seating can prevent the blender from turning on because Vitamix models have a safety interlock system that stops operation if the container is not correctly placed. Always check this before assuming a motor problem.
Signs you need professional help
Blender base feels unusually hot even after cooling period
Unusual grinding or burning noises from the motor
Blender won’t reset after pressing the internal reset button
Power intermittently cuts out without apparent cause
Visible electrical damage or burning odor from the blender base
Motor failure isn’t just overheating. Persistent failure to run smoothly, strange noises, or failure to start despite proper power and container setup suggest an electrical or mechanical fault needing expert diagnosis.
Consider the cost of repair versus replacement carefully. If your blender is old or repair costs approach the price of a new unit, replacement is usually more sensible. Vitamix’s high performance and durability make their blenders a long-term investment.
Avoid costly delays
Continuing to operate a blender with motor or electrical faults can cause further damage and higher repair costs. Stop use and seek professional service promptly if you notice troubling symptoms.
Best for repair or replacement decisions
Vitamix 5200 Professional-Grade Blender
The Vitamix 5200’s durable motor base and widely available parts make it a practical choice if your current blender is beyond economical repair.
Why does my Vitamix power on but the blades don’t spin?
This usually points to a worn drive socket or a jammed blade assembly rather than a motor failure. Check for any debris blocking the blades and inspect the drive socket for cracks or wear. These parts often wear out before the motor itself does.
How can I tell if the drive socket needs replacing?
Look for signs like the blades spinning loosely or not at all despite the motor running. The plastic coupling at the bottom of the container may show visible cracks or excessive wear. If the blades don’t engage properly or you hear grinding noises, the drive socket likely needs replacement.
Can I replace the blade assembly myself safely?
Yes, you can replace the blade assembly if you follow safety steps carefully. Always unplug the blender first and handle blades with caution to avoid cuts. Use manufacturer instructions and the right tools to avoid damage or injury during replacement.
How do I reset the Vitamix internal fuse or reset button?
Unplug the blender and wait at least 60 to 90 minutes to allow the internal fuse to reset. Some models have a reset button near the power cord connection that you can press after unplugging. This process restores function after motor overload or overheating triggers the safety feature.
What causes the blender motor to overheat and shut down?
Overheating happens when the motor works too hard, such as blending thick or dense ingredients for too long. Blocked blades or a jammed assembly increase resistance and cause the motor to strain. The Vitamix’s thermal protection then stops the motor to prevent damage.
How long should I wait after overheating before using the blender again?
You should wait at least 45 minutes for the motor to cool down completely before restarting. Using the blender too soon risks triggering the overload protection again. Let the base feel cool to the touch as a sign it’s safe to use.
When is it better to replace the Vitamix rather than repair it?
Consider replacement if the motor or electrical components show signs of failure beyond basic troubleshooting. Extensive damage, repeated overheating, or costly repairs often justify buying a new unit. If your blender is older than 10 years and parts like the drive socket or blade assembly repeatedly fail, replacement might be more practical.