Skip to content
JuicerAdvicesDrink safety, answered
Omega

Omega Juicer Troubleshooting: Fix Common Issues Fast

On this page 7 sections
  1. Omega Juicer Troubleshooting: Common Problems and How to Fix Them
  2. Why Your Omega Juicer Won’t Start: Safety Locks and Assembly
  3. Fixing Leaks: How to Identify and Repair Sources of Juicer Leaks
  4. Improving Juicing Performance: Clearing Clogs and Maximizing Yield
  5. When to Repair, Replace, or Contact Omega Support
  6. Pre-Use Checklist to Avoid Juicer Problems
  7. Frequently Asked Questions
The short fix
The most common reason an Omega juicer stops working is improper assembly or a safety lock not engaged; always check the parts fit together correctly first. This simple step solves most issues and keeps the motor safe from damage.

Many people think Omega juicers break down easily, but usually the problem is a small assembly issue or a clogged part. The juicer’s safety features prevent it from running if something is out of place, protecting the motor and the user.

This guide walks you through quick checks and step-by-step fixes for common issues like no power, leaks, unusual noises, and overheating. It also helps you decide when to seek professional help or replace parts.

Key takeaways
Always unplug your juicer before any inspection or repair to avoid injury.
Check that all parts are correctly aligned and locked before use; misalignment is the top cause of no-start issues.
Clean the filter screen and auger regularly to prevent clogs that reduce juice yield and cause motor strain.
If the motor overheats, let it cool for at least 30 minutes and avoid juicing continuously for more than 15 minutes.
Replace worn seals or cracked parts promptly to stop leaks and protect your juicer’s longevity.

Omega Juicer Troubleshooting: Common Problems and How to Fix Them

If your Omega juicer, including the Omega NC900HDC model, isn’t working, the first thing to check is whether it’s assembled correctly with all safety locks engaged. Most common problems happen because parts aren’t fitting together right, causing the motor not to start or run.

Start by unplugging the juicer and inspecting the assembly. Make sure the locking ring is tight, the auger is in place, and the cover is sealed properly. If any part is loose or misaligned, the motor won’t engage to protect itself from damage.

1
Check Assembly
Confirm the juicer parts fit securely and the safety locks click into place.
2
Inspect Power
Verify the power cord is plugged in and the outlet works by testing with another device.
3
Test Start Button
Press the power button firmly; if it doesn’t start, recheck assembly or try resetting if your model has that feature.

Motor overheating is another frequent issue with Omega juicers. If the motor feels hot or the juicer stops suddenly, unplug it and let it cool for at least 15 minutes. Overheating usually happens when the juicer is overloaded or clogged with pulp, causing extra strain on the motor.

To prevent overheating, juice smaller batches at a time and use the reverse function if your model has one to clear jams. Cleaning the juicer thoroughly after each use also helps maintain airflow and motor cooling.

Pulp backup and low juice yield often result from a clogged juicing screen or end cap. When pulp builds up, juice can’t flow freely, reducing output and causing the juicer to work harder.

1
Disassemble
Turn off and unplug the juicer, then remove the pulp container and juicing screen.
2
Clean Thoroughly
Rinse the screen under running water and use a brush to remove pulp stuck in the fine mesh.
3
Check Pressure Settings
Adjust the end cap pressure to a higher setting if your model allows to improve extraction.

A stuck locking ring can block juicer operation. This usually happens if food residue dries and hardens around the threads. To free it, soak the locking ring and adjacent parts in warm soapy water for 10-15 minutes, then gently twist with a cloth for grip.

If the locking ring remains stuck, avoid forcing it because that could damage the plastic parts. Instead, try tapping the ring lightly around its edge to loosen any hardened pulp before trying again.

Leaks are another common complaint. They often come from the spout, pulp container, or juicing screen not seated properly or from cracks in the parts.
1
Inspect Seals
Make sure the juice container is correctly positioned and the spout is clean and undamaged.
2
Check for Cracks
Look over the juicing screen and pulp container for any damage that could cause leaks.
3
Clean Thoroughly
Residue build-up can prevent tight seals, so clean all parts after every use.
Omega Cold Press Juicer Machine
If pulp clogs and leaks are frequent
Omega Cold Press Juicer Machine
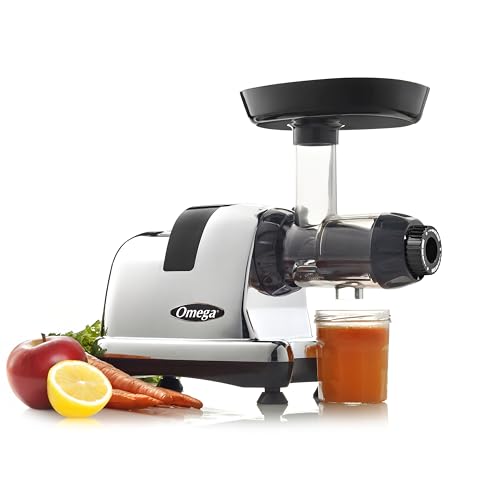
The Omega Cold Press Juicer Machine (product 1) has an adjustable end cap with three pressure settings that help reduce pulp backup and leaks by optimizing juice extraction and pulp ejection.
View on Amazon

Contact Omega support or consider replacing parts if your juicer consistently fails to start after checking assembly, overheats despite proper use, or suffers from cracked components. Using original Omega replacement parts ensures compatibility and safety.

Safety Warning
Never try to bypass safety locks or force parts to fit, as this can damage the motor or cause injury. Always unplug the juicer before cleaning or troubleshooting to avoid electric shock or injury.
When to call your doctor
Call your healthcare provider if using the juicer causes symptoms like severe stomach pain, unusual allergic reactions, or if you suspect you have ingested spoiled juice due to leaks or contamination.
Severe abdominal pain after drinking juice
Signs of allergic reaction such as swelling or rash
Symptoms of foodborne illness like vomiting or diarrhea

Why Your Omega Juicer Won’t Start: Safety Locks and Assembly

omega juicer troubleshooting: Why Your Omega Juicer Won’t Start: Safety Locks and Assembly

If your Omega juicer, including the Omega NC900HDC model, won’t start, the most likely cause is a safety lock or assembly issue. These juicers have built-in safety features that prevent the motor from running unless all parts are properly aligned and secured.

Start by checking the hopper alignment. The hopper must fit snugly onto the juicer base with the tabs fully seated. If the hopper is misaligned even slightly, the motor won’t engage.

1
Check the Hopper Alignment
Remove and reposition the hopper, making sure the tabs fit perfectly into their slots on the juicer body.
2
Verify the Lid Lock
The lid must snap into place securely. Listen for a click or feel for resistance that confirms it is locked.
3
Ensure All Parts Snap Together
Inspect each component—hopper, lid, drum—and press firmly until you feel or hear them lock into place.
Missing Magnets
Some Omega models use small magnets in the hopper tab to help detect proper assembly. If these magnets are missing or dislodged, the juicer may not start. You can replace lost magnets to restore this safety feature.
Avoid Forcing Parts
Don’t force parts into place. If something doesn’t fit easily, check alignment instead. Forcing can damage components and cause the juicer not to work.
Safety Lock Checklist
Hopper tabs fully seated and aligned
Lid locked with audible or tactile click
Magnet on hopper tab present and undamaged
All parts securely snapped into place

If you’ve confirmed all safety locks are engaged and the juicer still won’t start, unplug it and inspect the power cord and outlet. Sometimes the issue is electrical rather than mechanical.

You can find more details on assembly and safety locks for the Omega NC900HDC juicer in its manual or at the omega nc900hdc juicer page.

Fixing Leaks: How to Identify and Repair Sources of Juicer Leaks

A common complaint with Omega juicers is leaks, especially around the drum or spout. Fixing a juicer spout leak usually involves checking seals and alignment before suspecting a cracked part.

Start by inspecting the drum seal. This silicone ring sits between the drum and juicer housing and prevents juice from escaping. Over time, it can wear out or tear, causing leaks.

1
Check the Drum Seal
Remove the drum and examine the silicone ring for cracks or deformation. Replace it if damaged or hardened.
2
Align and Tighten the End Cap
The end cap screws tightly onto the drum. If it’s loose or misaligned, juice can leak out. Screw it on firmly but don’t overtighten.
3
Inspect the Pulp Container
Make sure the pulp container fits correctly under the juicer and has no cracks or gaps that let juice drip out.
Leak Prevention Checklist
Silicone drum seal intact and flexible
End cap screwed on tightly and aligned
Pulp container properly seated and undamaged

If leaks persist after these checks, you might want to visit the omega juicer official site for replacement parts or additional troubleshooting guides.

From JuicerAdvices · our own guideChoosing or using a juicer? Page 3 compares the types; page 15 fixes the common problems.Home Juicing Starter Kit: the printable guide and its Excel calculatorHome Juicing Starter KitMake fresh juice that tastes good, costs less and keeps safely: 40 recipes with exact amounts, a yield chart and a 4-week plan.40 juice, smoothie and shot recipesYield, storage and food-safety chartsCost, yield and shopping-list calculator (Excel)$14.99 $9.99Get it for $9.99See what's inside and watch the 2-minute video →18-page printable PDF + Excel calculator · instant download · 30-day refund

Improving Juicing Performance: Clearing Clogs and Maximizing Yield

Omega cold press juicers are designed to extract the most juice with minimal heat, but clogs and low yield can still happen if parts aren’t cleaned or used right.

omega juicer troubleshooting: Improving Juicing Performance: Clearing Clogs and Maximizing Yield

Start by regularly cleaning the filter screen and auger. The fine mesh filter traps pulp and fibers; when it clogs, juice flow slows and pressure builds, risking motor strain. Soak the filter in warm, soapy water and gently scrub with a soft brush after every use.

Cut produce into smaller pieces, about 1 to 2 inches, to help the auger process ingredients smoothly without jamming. Large chunks can block the feed chute and reduce juice output.

Adjusting the pulp settings on some Omega models can help. A coarser pulp setting lets more fiber through, which is better for leafy greens, while finer settings work well for dense root vegetables. Experiment with these to match your produce.

Alternating hard and soft ingredients during juicing helps keep the auger turning freely. For example, follow carrots with apples or cucumbers to prevent buildup on the filter and improve juice extraction.

1
Clean Filter Screen
Remove and soak in warm, soapy water. Scrub gently with a soft brush to clear pulp.
2
Cut Produce
Chop fruits and vegetables into small, uniform pieces for easier juicing.
3
Adjust Pulp Setting
If your model allows, switch between coarse and fine to fit the produce type.
4
Alternate Ingredients
Juice hard and soft items in turns to avoid clogs and keep juice flowing.
Keep It Flowing
Rinse the parts periodically during juicing to prevent buildup and maintain steady juice output.

When to Repair, Replace, or Contact Omega Support

The Omega juicer official site recommends contacting support if you notice unusual noises, burning smells, or if the motor stops suddenly, as these may indicate electrical or motor damage requiring expert repair.

Before calling, check if your model is still under warranty, which usually covers defects for up to 15 years on some parts. Keep your purchase receipt handy and register your juicer on the Omega juicers official website to access warranty service.

Replacement parts like the filter screen, auger, and pulp container often cost less than professional repairs and can restore performance if damage is limited to wear and tear.

If your juicer has multiple malfunctions or recurring issues, replacing it may be more cost-effective than repeated repairs, especially if it’s older or out of warranty.

Check Your Warranty
Warranty coverage and terms vary by model and purchase date; verify your specific plan on the official Omega website before proceeding.
Safety First
Avoid opening or repairing electrical components yourself. Unplug the juicer and contact Omega support if you suspect internal damage.

Pre-Use Checklist to Avoid Juicer Problems

Before you start juicing with your Omega juicer, running through a quick checklist can prevent most common issues and keep your machine running smoothly.

  • Make sure all parts fit snugly and that safety locks are fully engaged to allow the motor to start.
  • Inspect all parts for cracks, chips, or signs of wear, especially the juicing screen and auger, to avoid leaks or breakage during use.
  • Confirm that the pulp container is securely in place with seals properly seated to prevent leaks or messes.
  • Clean the juicing screen and auger thoroughly before each use; residue buildup can reduce juice yield and strain the motor.
  • Check that the motor vents are clear of dust and debris to help the motor cool efficiently and prevent overheating.
Quick check before juicing
Even if your Omega juicer has been sitting unused for a while, these steps help avoid surprises and protect the motor from damage.

Frequently Asked Questions

What should I do if my Omega juicer won’t turn on?
First, check that all parts are assembled correctly and the safety locks are fully engaged. If it still won’t start, unplug and inspect the power cord and outlet. Persistent issues may require contacting Omega support to avoid motor damage.
How can I tell if the motor is overheating?
Overheating often causes a burning smell or unusual noises from the juicer. The motor may also stop suddenly or fail to start after repeated use. To prevent damage, allow the machine to cool for at least 15 minutes before restarting.
Why is my Omega juicer leaking juice?
Leaks commonly occur if the drum or spout isn’t seated properly or if seals are worn. Clean and reassemble parts carefully, checking for cracks or damage. For detailed steps, see our guide on juicer spout leak fix.
How do I fix a stuck locking ring on my juicer?
A stuck locking ring usually means dried pulp or juice residue is gumming up the threads. Soak the ring in warm, soapy water and use a soft brush to clean the grooves before trying to turn it again. Avoid forcing it to prevent breakage.
Can I use my Omega juicer continuously without breaks?
Omega juicers are designed for intermittent use; continuous running can overheat the motor. Follow the recommended duty cycle in your model’s manual, typically around 30 minutes of use followed by a rest period to cool down.
When should I replace parts on my Omega juicer?
Replace parts like the auger, screen, or seals when you notice cracks, excessive wear, or persistent leaks. Regular inspection every few months helps catch issues early and keeps performance optimal.
How do Omega juicer warranties work and who do I contact for repairs?
Omega juicers usually come with a 15-year warranty on the motor and shorter coverage on parts. Contact Omega’s customer service directly for repair or replacement inquiries, providing your purchase details and model number.

Editor

Emily Jones edits JuicerAdvices: plain answers about juices, teas, coffee and everyday drinks, how much is safe, and how they fit with common health conditions, medicines and medical procedures. Every guide is checked against public health and nutrition sources and tells you when to ask your doctor or pharmacist.

More in Omega