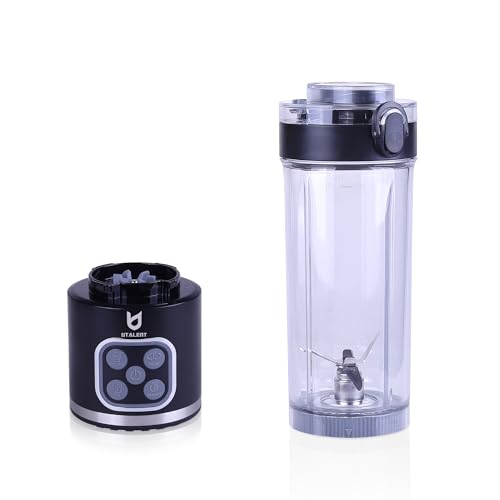
You just finished a brutal leg day. You grab your shaker bottle, dump in a scoop of whey, add water, and shake like your life depends on it. You unscrew the lid and find a graveyard of powdery clumps floating at the top. Sound familiar?
This article settles the blend vs. shake debate once and for all. You’ll learn why clumps form, how each method changes digestion and texture, and exactly which tool to use for your specific protein type and daily routine. No fluff, just the mechanics.
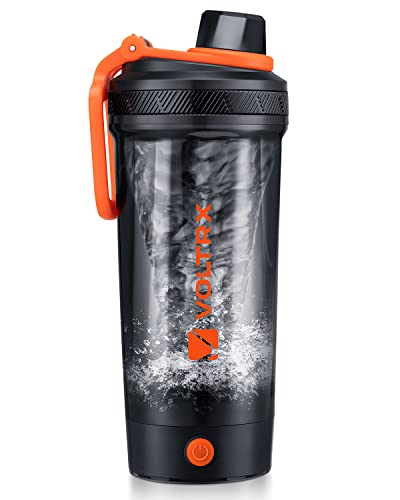
VOLTRX
VOLTRX Electric Protein Shaker Bottle - USB…
- A Shake to Stir Revolution: Before VOLTRX transformed the shaker industry, a steel wire ball shaker bottle that produced a clangin…
- Blend SQUASHED Banana In: Thanks to the powerful base, you can now add SQUASHED bananas to your drink. Gallium electric shaker bot…
- 15 Seconds To Smooth: The VOLTRX Gallium electric protein shaker bottle uses a powerful 6000rpm motor with a patent blade design a…
If you’re tired of lumpy shakes and want a foolproof solution, the VOLTRX Electric Protein Shaker Bottle handles the mixing for you with a one-touch stirring system that runs for 30 seconds and shuts off automatically. It’s a solid middle ground between a manual shaker and a full blender.

The Real Difference Between Blending and Shaking
Shaking and blending both mix powder into liquid, but they do it differently. A shaker relies on manual force and a metal ball or whisk to break up clumps. A blender uses high-speed blades to shear powder particles apart and force liquid into every crevice.
That difference matters more than you’d think. Blades create a vortex that pulls powder down and disperses it evenly. Your arm creates a chaotic tumble that leaves dry pockets behind, especially if you don’t shake hard enough or long enough.
There’s also a time factor. A good shake takes 30 to 60 seconds of vigorous effort. A blender does the job in 10 to 15 seconds. When you’re rushing out the door at 6 AM, those extra 45 seconds feel like an eternity.
But blending isn’t always better. It introduces air, which creates foam. It requires cleanup. And if you’re using a bulky countertop blender, you’re stuck near an outlet. A shaker goes anywhere.
The Science of Clumps: Why Your Shake Gets Chunky
Clumps form because protein powder is hydrophobic on the outside. The particles repel water initially, so they float on the surface and stick together. When you shake, the water can’t penetrate the dry center of each clump fast enough.
Surface tension is the real culprit. Water molecules pull together tightly at the surface, creating a barrier. Powder particles get trapped in that barrier and bond with each other before they ever get wet.
Temperature changes everything. Cold water increases surface tension, making clumps worse. Warm water (not hot, around 95-105°F) lowers surface tension and lets powder hydrate faster. That’s why your shake mixes better with lukewarm water than ice-cold water.
Another factor is the powder itself. Whey isolate hydrates quickly because the particles are small and uniform. Casein is thicker and forms clumps easily. Plant-based proteins like pea or rice have larger particles and need more aggressive mixing.
Here’s a pro tip: add liquid first, then powder. If you dump powder into an empty shaker and add water on top, the powder sticks to the bottom and sides. Liquid-first gives the powder a liquid surface to land on, which reduces clumping significantly.
Shaker Bottles: Pros, Cons, and the Right Way to Use Them
Shaker bottles are the default choice for most lifters. They’re cheap, portable, and get the job done with minimal fuss. But not all shakers are created equal.
The mixing mechanism matters. A basic shaker with a loose metal ball works okay for whey isolate but struggles with casein and plant blends. A shaker with a built-in wire whisk or a blender ball with more surface area does a better job breaking up clumps.
You also need to think about the seal. A cheap lid that leaks ruins your gym bag and your day. Look for a shaker with a tight screw-top lid and a flip cap that locks securely.
One more thing: capacity. A 24-ounce shaker handles one scoop of powder and 12 to 16 ounces of liquid comfortably. If you’re doubling up on scoops for a mass gainer, you need a 28-ounce or larger bottle.
Choosing the Right Shaker (Mixing Ball vs. Blender Ball vs. Wire Whisk)
The mixing ball is the classic stainless steel spring. It works fine for whey isolate but leaves clumps in thicker proteins. The blender ball is a larger, perforated sphere that creates more turbulence. It’s better but still not perfect for casein.
The wire whisk is a plastic or metal cage that sits at the bottom of the bottle. It creates more shear force than a ball because it has more surface area. Whisk-style shakers handle plant-based proteins much better.
If you drink protein daily, invest in a shaker with a whisk. It costs a few dollars more but saves you from choking down lumps. The protein shake spoilage article covers what happens when you leave a dirty shaker in your car for a week — spoiler, it’s not pretty.
Blenders: When Power Matters and When It’s Overkill
A blender is the gold standard for smooth, lump-free shakes. But you don’t need a $500 Vitamix to mix protein powder. Any blender with at least 300 watts of power will do the job.
Here’s the catch: blenders add air. The high-speed blades whip air into the liquid, creating foam. Some people hate the froth, especially with whey protein. The foam isn’t harmful, but it can make you feel bloated if you drink it fast.
Blenders also require more cleanup. You have to rinse the jar, the lid, and the blades after every use. A shaker takes 10 seconds to rinse. A blender takes a minute or more, and if you let it sit, the residue dries and becomes a nightmare to remove.
For most people, a blender is overkill for protein powder alone. But if you’re adding fruit, peanut butter, oats, or ice, a blender becomes necessary. You can’t break down a frozen banana with a shaker ball.
Standard vs. Immersion vs. Bullet Blenders
A standard countertop blender has a large pitcher and a powerful motor. It’s great for smoothies and batch prep but takes up counter space and is annoying to clean for a single shake.
An immersion blender (the stick kind) lets you blend directly in your shaker bottle or a tall cup. It’s compact, easy to clean, and gives you more control. The downside is that you have to hold it and move it around manually, which takes practice.
A bullet blender (like a NutriBullet) is the sweet spot for protein shakes. It has a small cup that doubles as your drinking vessel, so you blend and drink from the same container. The blades are powerful enough to handle ice and frozen fruit, and cleanup is quick.
If you’re serious about smooth, consistent shakes, a bullet blender is the best investment. For a deeper comparison of blender types, check out this home blender guide.
The Ultimate Step-by-Step Mixing Method (For Both Tools)
Here’s the exact process I use, and it works every time.
For a Shaker Bottle
- Add 8-12 ounces of liquid (water, milk, or plant milk) to the bottle first.
- Add your protein powder scoop on top of the liquid.
- If you’re using a mixing ball or whisk, drop it in now.
- Close the lid tightly and shake for 30-45 seconds. Shake in a circular motion, not just up and down.
- Let the shake sit for 30 seconds, then give it one final 5-second shake. This allows the powder to fully hydrate.
- Open the lid and check for clumps. If you see any, shake for another 10 seconds.
For a Blender
- Add liquid first, then powder, then any extras (fruit, ice, nut butter).
- Start the blender on low for 5 seconds to incorporate the powder without splattering.
- Increase to medium-high and blend for 15-20 seconds total.
- Stop and scrape down the sides with a spatula if needed.
- Blend for another 5-10 seconds on high if you want a smoother texture.
- Pour and drink immediately. Don’t let it sit, or the foam will separate.
Pro tip: if you’re using cold liquid, let it sit at room temperature for 5 minutes before mixing. This reduces surface tension and cuts clumping dramatically.
How Mixing Affects Digestion and Protein Absorption
Here’s where most people get confused. Does blending change how your body digests protein? The short answer is no, not in any meaningful way.
Your stomach acid and digestive enzymes break down protein regardless of whether it was shaken or blended. The clumps you swallow are still digested, just more slowly because the surface area is smaller. A clump of dry powder takes longer to break down than fully hydrated particles.
So blending doesn’t speed up amino acid absorption. It just makes the shake easier to drink and digest because the powder is fully dissolved. If you swallow a lumpy shake, your stomach has to work harder to break down those dry pockets.
There’s one small caveat: blending introduces air, which can cause gas and bloating in some people. If you’re prone to that, shake instead of blend. The protein shake bloating article explains this in more detail.
The real digestion factor is the protein type, not the mixing method. Whey isolate absorbs fastest, followed by whey concentrate, then casein, which digests over several hours. Plant proteins fall somewhere in between depending on the source.
Texture Control: Matching Your Tool to Your Protein Type
Different proteins behave differently in liquid. Here’s how to match your mixing method to your powder.
Whey Isolate: Mixes easily with a shaker. Use cold or room-temperature water. A blender creates too much foam for this type. Shake for 20-30 seconds and you’re done.
Whey Concentrate: Slightly thicker than isolate. A shaker with a whisk works well. If you’re using a blender ball, shake for 45 seconds. Warm liquid helps.
Casein: The worst clumper. Casein forms a thick paste when it hits water. You need a blender or a high-quality whisk shaker. Even then, expect some texture. Add liquid slowly and stir as you go.
Plant-Based (Pea, Rice, Hemp): These have larger particles and a gritty texture. A blender is strongly recommended. Even with a blender, you may notice a slight chalkiness that won’t go away. That’s normal.
Egg White Protein: Foams excessively. Use a shaker with minimal agitation, or blend on low speed for just a few seconds. Let the foam settle before drinking.
One general rule: if the protein is expensive (like isolate), shake to avoid wasting any stuck to the blender jar. If it’s cheap and thick (like casein), blend to make it drinkable.
Maintenance and Hygiene: Cleaning Your Gear Properly
Protein powder residue is a breeding ground for bacteria. If you don’t clean your shaker or blender immediately after use, you’re inviting mold and a sour smell that never goes away.
Rinse your shaker with hot water and a drop of dish soap immediately after drinking. Shake it with the lid on for 10 seconds, then rinse thoroughly. Let it air dry with the lid off.
For blenders, fill the jar halfway with warm water and a drop of soap. Run it on high for 10 seconds. Rinse and air dry. The blade assembly needs extra attention — remove it and scrub the underside where powder collects.
Once a week, deep clean with a mixture of white vinegar and water (1:3 ratio). Let it soak for 15 minutes, then rinse thoroughly. This kills bacteria and removes mineral buildup from hard water.
If your shaker has a rubber gasket or seal, remove it and wash it separately. Those areas trap moisture and grow mold even when the rest of the bottle looks clean.
Replace your shaker bottle every 3-6 months if you use it daily. Cracks and scratches harbor bacteria that dish soap can’t reach.
The Decision Matrix: Blend or Shake Based on Your Day
Here’s a practical way to decide which method to use, depending on your situation.
| Situation | Best Method | Why |
|---|---|---|
| At home, post-workout | Blend | You have time and want the smoothest texture. Add ice or fruit. |
| At the gym, in a hurry | Shake | Portable and fast. Use a whisk-style shaker for best results. |
| On the road / travel | Shake | No electricity needed. Pack a pre-measured container of powder. |
| Meal replacement with oats, nut butter, or fruit | Blend | Solid ingredients require blade power to break down. |
| Casein before bed | Blend | Thick powder needs maximum shear force to avoid clumps. |
| Whey isolate for a quick snack | Shake | Isolate dissolves easily. Blending just adds foam. |
| Batch prep for the week | Blend | Make 2-3 shakes at once and store in the fridge. |
The cost factor matters too. A basic shaker costs $10-15. A good bullet blender costs $50-100. A high-end countertop blender costs $300+. If you only drink protein powder with water, the shaker is all you need. If you want smoothies and meal replacements, the blender pays for itself.
Final Verdict: Which Method Wins?
There’s no universal winner. It depends on your protein type, your schedule, and your tolerance for foam and cleanup.
For everyday use with whey isolate or concentrate, a good shaker bottle wins. It’s faster, easier to clean, and portable. For casein, plant-based blends, or any shake with solid add-ins, a blender wins.
If you want the best of both worlds, consider an electric shaker like the VOLTRX. It gives you blender-like consistency without the cleanup hassle. You press a button, wait 30 seconds, and drink. It’s not as powerful as a full blender for frozen fruit, but for protein powder alone, it’s perfect.
Whichever method you choose, the key is consistency. Mix your shake the same way every time, use liquid-first, and clean your gear immediately. That’s the whole secret.
Frequently Asked Questions
Can I blend my protein shake the night before?
Yes, but it’s not ideal. Blended shakes separate when stored in the fridge. The protein settles at the bottom, and the liquid becomes watery on top. Give it a vigorous shake before drinking. The texture won’t be as smooth as fresh, but it’s fine for convenience. Store it in an airtight container and consume within 24 hours.
Does blending destroy protein or amino acids?
No. The blades generate heat, but not enough to denature protein in any meaningful way. Your stomach acid denatures protein far more aggressively than any blender. The only thing blending might do is slightly oxidize some nutrients, but the effect is negligible.
Why does my protein shake foam up so much?
Foam is caused by air being whipped into the liquid. Blenders create more foam than shakers because the blades spin faster. Whey protein is especially prone to foaming because of its surface-active properties. To reduce foam, blend on low speed, use room-temperature liquid, and let the shake sit for a minute before drinking.
Should I use milk or water in my protein shake?
Milk makes a creamier, richer shake but adds calories and slows digestion slightly because of the casein and lactose. Water mixes faster and keeps the shake lighter. For post-workout, water is better because it delivers protein faster. For a meal replacement or dessert-like shake, milk wins.
Can I use a blender bottle to mix pre-workout or meal replacements?
Absolutely. The same principles apply. Pre-workout powders often contain citric acid and caffeine, which dissolve easily with a simple shake. Meal replacements are thicker and may need a whisk shaker or blender. Just remember to clean the bottle immediately, because pre-workout residue can be sticky and hard to remove once dry.
Three Common Mistakes and How to Avoid Them
Mistake 1: Adding powder before liquid. This creates clumps that stick to the bottom. Always pour liquid first, then powder. It’s a simple switch that fixes most texture problems.
Mistake 2: Using ice-cold liquid. Cold water increases surface tension and makes clumps worse. Use room-temperature water or let your shake sit for a few minutes after mixing. You can still add ice after the powder is dissolved.
Mistake 3: Not cleaning your gear immediately. Protein residue dries into a cement-like film that’s nearly impossible to remove. Rinse your shaker or blender within 5 minutes of use. Your future self will thank you.
- Shake for whey isolate, blend for casein and plant proteins.
- Always add liquid first, then powder.
- Use room-temperature liquid to prevent clumps.
- Clean your shaker or blender immediately after use.
- An electric shaker is a good compromise between convenience and texture.
- Blending doesn’t affect digestion speed, only drinkability.
- Replace your shaker bottle every 3-6 months.